For one of my blogs, I needed a simple and clean Table of Contents (ToC) implementation that uses pure HTML and CSS only (no plugins or JavaScripts). I can then manually add the ToC into any page where I want to show it. This method has the benefit of not having to load any JS files on every page of the site. More importantly, I don’t have to maintain any JavaScript code for it.
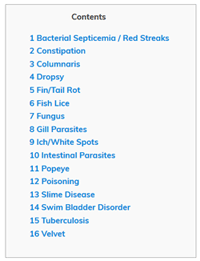
Most of the tutorials on this topic uses a solution that involves using JavaScript or a Plugin. In this tutorial I will explain how I created a simple table of contents that look like the following screenshot using only HTML and CSS. You should be able to copy and paste most of the code. However, you do have to understand CSS and HTML code a little to utilize this.
The CSS Code for the ToC
Add the following CSS code in your theme’s stylesheet file. Alternatively, you can inject this CSS code using a custom CSS plugin like this one.
#toc_container {
    background: #f9f9f9 none repeat scroll 0 0;
    border: 1px solid #aaa;
    display: table;
    font-size: 95%;
    margin-bottom: 1em;
    padding: 20px;
    width: auto;
}

.toc_title {
    font-weight: 700;
    text-align: center;
}

#toc_container li, #toc_container ul, #toc_container ul li{
    list-style: outside none none !important;
}
The HTML Code for the ToC
Now that the CSS code is in place, you can use simple HTML code like the following example to create a ToC in any page.
You are basically making a list of links that are in the page.
<div id="toc_container">
<p class="toc_title">Contents</p>
<ul class="toc_list"">
  <li><a href="#First_Point_Header">1 First Point Header</a>
  <ul>
    <li><a href="#First_Sub_Point_1">1.1 First Sub Point 1</a></li>
    <li><a href="#First_Sub_Point_2">1.2 First Sub Point 2</a></li>
  </ul>
</li>
<li><a href="#Second_Point_Header">2 Second Point Header</a></li>
<li><a href="#Third_Point_Header">3 Third Point Header</a></li>
</ul>
</div>
Now, assign the “id” parameter in your heading tags to connect the links from the above list. The following example shows how you can assign an “id” to any heading tags in your page.
<h2 id="First_Point_Header">First Point Header</h2>
That should do it.